Revclyffe: StarLink Overdue Update
Update here
11/2/20254 min read

StarLink up a Tree!!
My Starlink Tree Project: A DIY Solution to a Broken Internet
Why I Got Starlink
Over the summer, my local internet provider became a constant headache. Living in a rural area, options for reliable internet are limited. Most folks around here use old DSL lines, while others depend on whatever their satellite TV provider can offer. A local tech shop even tried setting up a mesh network, but cell service and fiber are basically nonexistent where I live.
At first, my DSL issues were just a few minutes of downtime here and there. Then it started happening daily, minutes turned into hours, and before long, I was spending most of my day without internet at all. I tried everything I could think of to fix it: tutorials, forums, troubleshooting videos, and even reaching out to local tech groups. Nothing worked.
Finally, I gave in and scheduled a service appointment. They said it would take two weeks. I waited. Nobody showed up. When I called, they said my appointment had been canceled, but never told me. They rescheduled me again, this time for three weeks later. Once again, nobody showed. When I called back, they claimed the tech came by but “no one was home.” Not only was I home, but I had multiple people and vehicles there waiting all day.
By that point, I was beyond frustrated. I demanded a fix and a review of my bill since I’d been paying for a service I couldn’t use. They promised another tech within a week, but I’d already had enough. That night, I ordered Starlink.
The Breaking Point
My Starlink kit arrived just a few days later. I set it up temporarily in the yard while I prepared a more permanent installation. Ironically, on the day the DSL tech was finally supposed to show, I was too busy working on my Starlink setup to care.
A few hours after lunch, a utility truck finally pulled up. The tech never came to the door, just started tinkering with the box outside. I watched through one of my homemade security cameras (a little side project I’d built to keep me sane while waiting). After an hour, he came in and confirmed everything I already knew: my line was dead, and he didn’t know why. He ran a new DSL line from the house to the telephone pole, ran tests again, and said he’d “be right back” after grabbing supplies from HQ, three hours away.
He never came back.
That was it. I canceled my service and spent the next few weeks fighting to have my bill cleared. Eventually, they wiped the balance.
Meanwhile, my Starlink was running strong.
What I Did With My Starlink
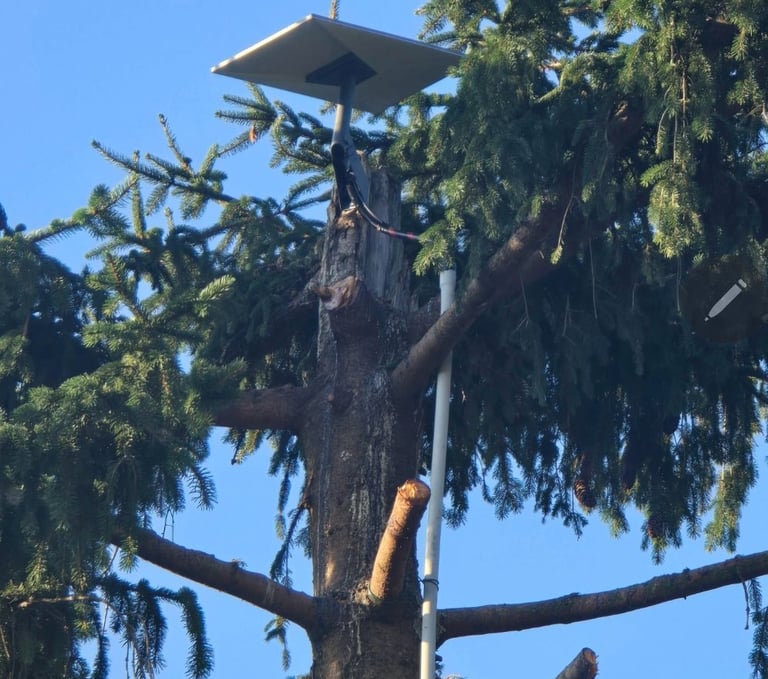
A few years ago, a massive pine tree in my front yard had been decapitated by a storm. When I started thinking about Starlink, that old tree stump gave me an idea: why not mount the dish at the top for maximum visibility?
I started planning the details. I had three main goals:
It needed to be secure - no chance of it coming down in bad weather.
The cable had to be protected - no exposed wiring for animals or elements to ruin.
It had to be accessible - I wanted to be able to reach it if I ever needed to.
At first, I considered running the cable through a garden hose for flexibility, but I decided on a 2-inch conduit system instead. The wider diameter and smooth 90° elbows meant the cable wouldn’t get pinched or damaged.
From there, I planned a trench from the base of the tree to the house, about 6 inches deep and 75 feet long. I used the same conduit to run the line underground, exiting next to an old coax hole near my front door for easy access inside.
Building It
The Starlink cable that comes in the box is only 75 feet long, just enough for most homes, but not enough for my setup. Luckily, I found a 150-foot replacement cable on Amazon.
Here’s how the project came together:
I trimmed the pine branches and created a “natural ladder” up the tree.
Dug a 6-inch trench for the conduit run to the house.
Laid and dry-fitted all conduit sections to confirm angles and bends.
Once satisfied, I ran the Starlink cable through and liquid-welded the joints for a waterproof seal.
At the top, I used a short piece of hose as extra protection where the cable plugs into the dish.
Finally, I backfilled the trench, packed in extra dirt, and tamped everything down firmly.
Results
When I powered everything up, Starlink connected almost instantly. After weeks of dealing with DSL outages and empty promises, seeing that first speed test succeed felt incredible.
Since mounting it in the tree, my connection has been stable, fast, and surprisingly resilient during bad weather.
Lessons Learned
Plan your cable path carefully before installation.
Use conduit with wide bends, Starlink cables can be fragile.
Test the dish on the ground first before committing to a final mount.
Consider weatherproofing and surge protection for long cable runs.
Don’t underestimate your ability to build your own solution, you might surprise yourself.
It wasn’t just about getting my internet back. This project reminded me how much I enjoy solving problems hands-on and how satisfying it is to take control of your own tech when the big companies drop the ball.